Disclaimer: make sure you’ve gone through Supply & Demand: Part One before reading this article (link below):
Introduction To Flip Zones
Flip zones are some of my absolute favorite zones to trade from within price action.
There are a lot of different names for flip zones including breaker blocks, reversal zones, reaction blocks, etc. and are taught in many different ways depending on where you learned them from.
It really doesn’t matter what you call them, or where you’ve learned them — what matters is that you know how to find them and you know how to trade them.
In this article I’m going to show you an easy and repeatable method to drawing and trading flip zones.
How To Draw Flip Zones
There are two forms of flip zones that I’m going to be covering in this article:
Flip zones that give a reaction
Flip zones that do not give a reaction
In part one of supply and demand, I explain exactly how I draw my zones, but lets have a quick recap:
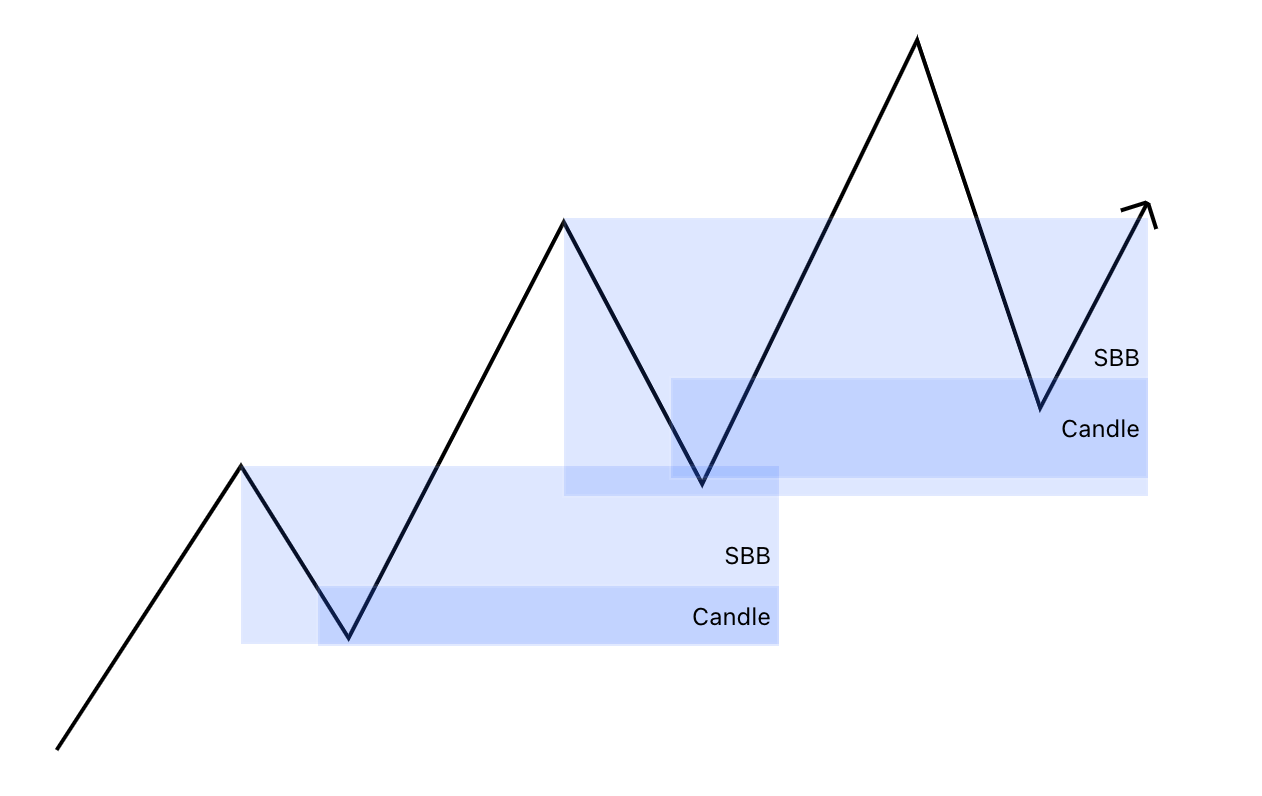
The first thing I do when looking for supply and demand is identify the sell-before-buy zone (SBB) or the buy-before-sell zone (BBS).
Once I find my SBB or BBS zone, then I can start to refine those zones into a single candle zone, and eventually a wick zone. Shown below:
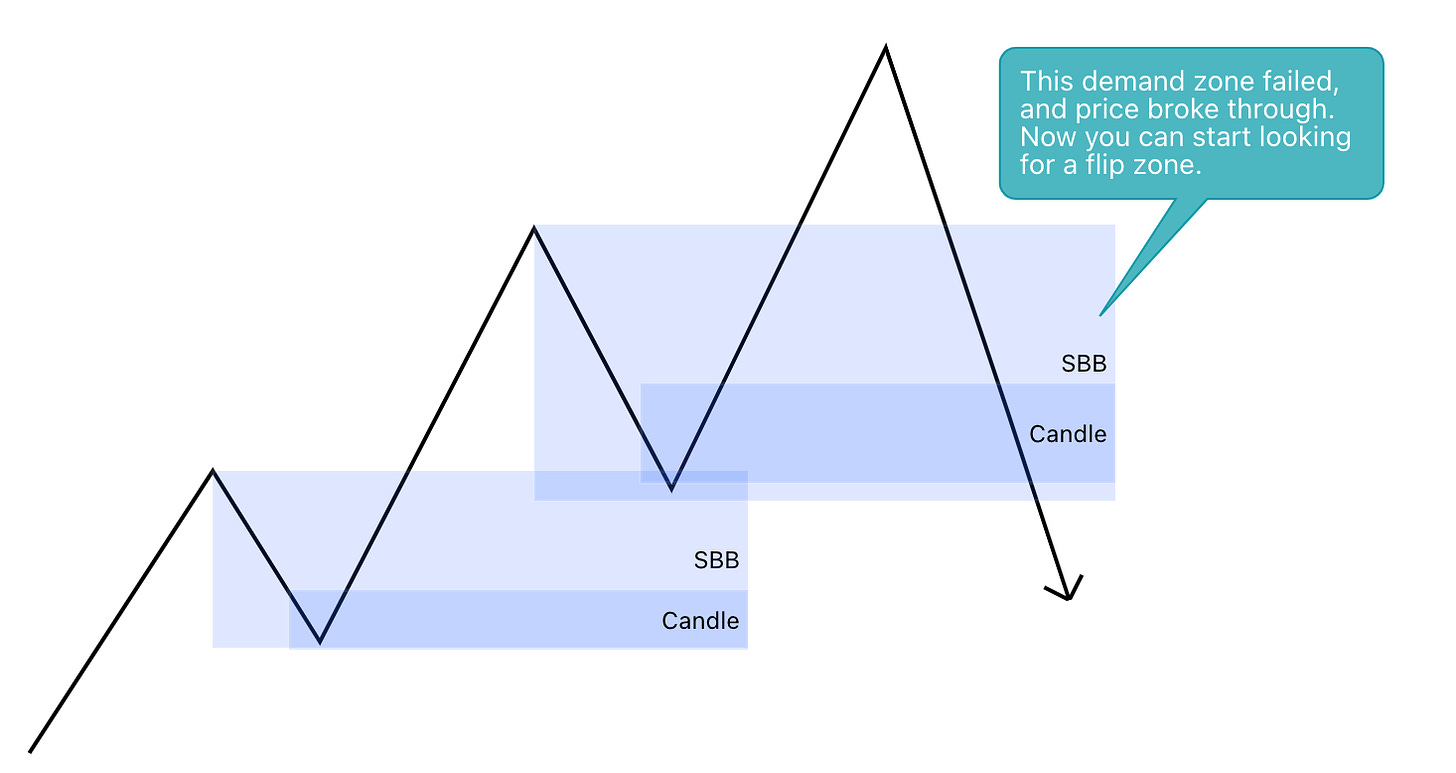
The key to finding a flip zone, is when a supply or demand zone fails.
Once you identify a supply or demand zone that fails, then you can start looking for a flip zone.
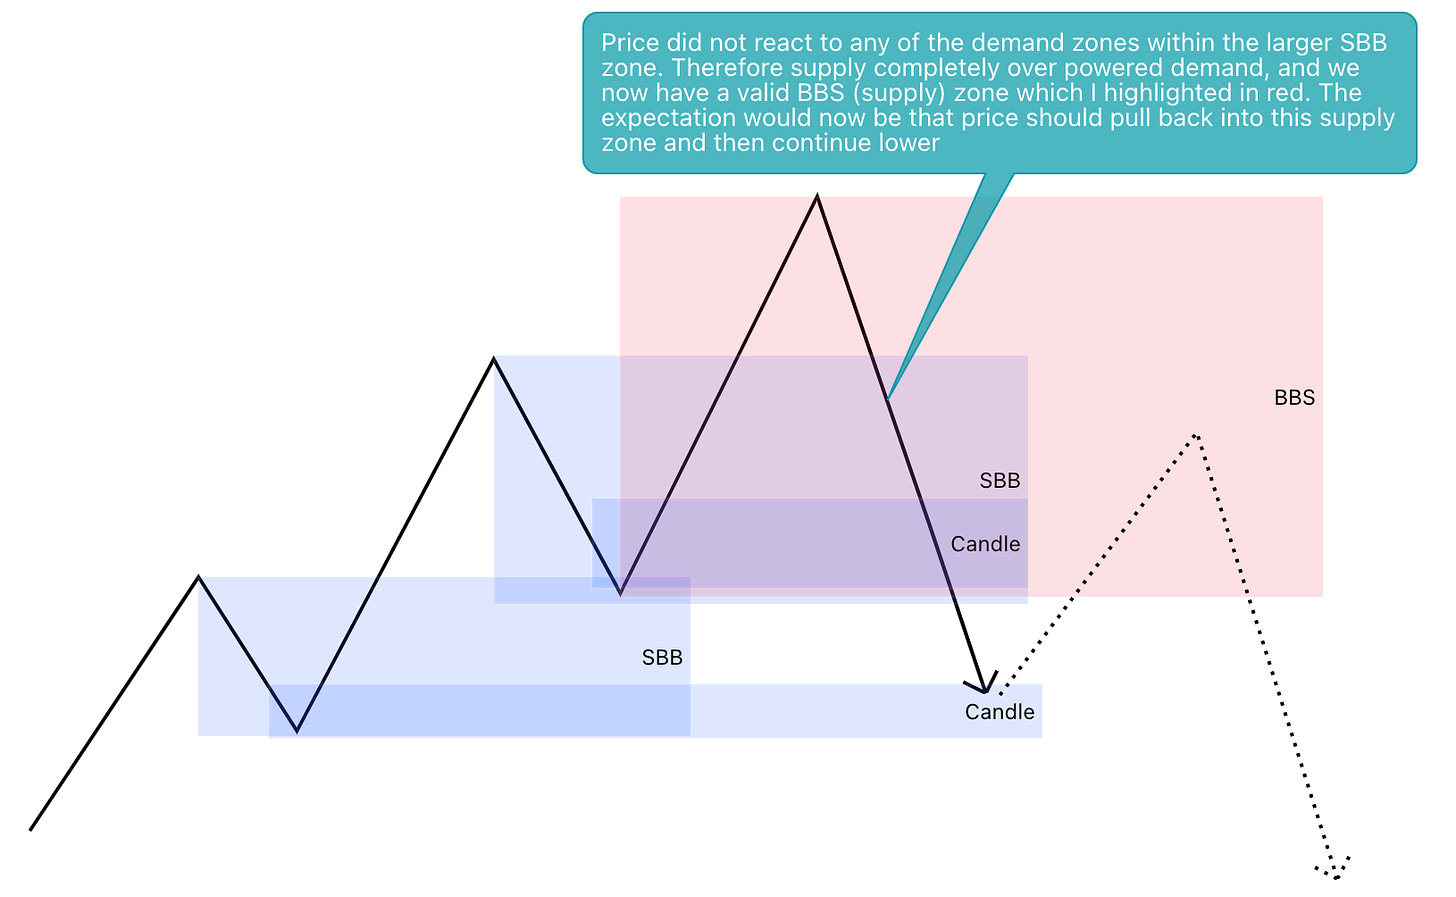
Below I have an example of a flip zone that was created that did not give a reaction to prior supply/ demand:
In the example above, you can see that price “flipped” a previous demand zone, and has now created a supply zone on top of it.
The key in this example as that price sliced right through a previous zone without giving any sort of reaction to the demand within that level.
What is left behind is a standard buy-before-sell, or supply zone.
As mentioned in part one, you can then continue to further refine this BBS zone into a single candle, and/or a wick zone.
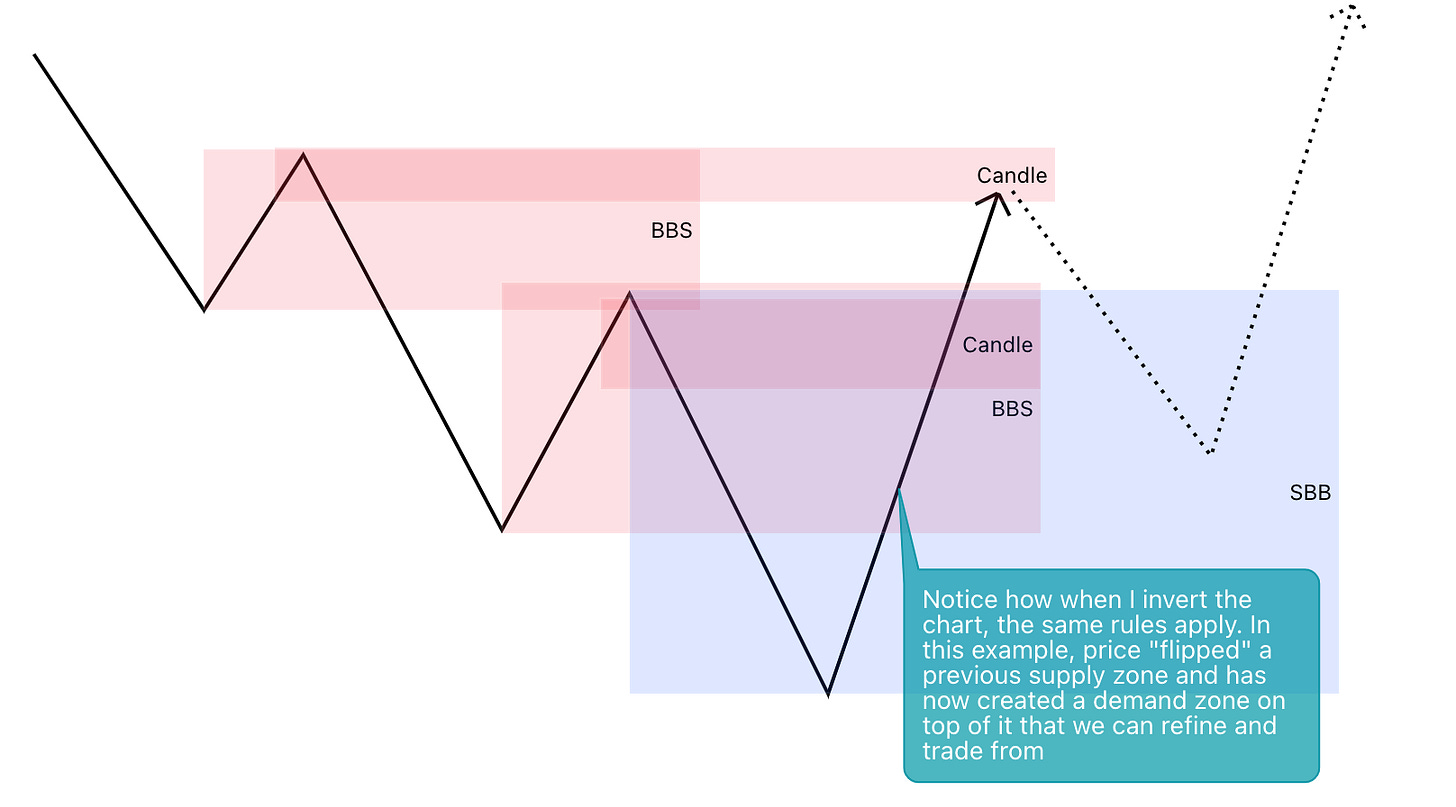
The same rules apply if we invert the chart:
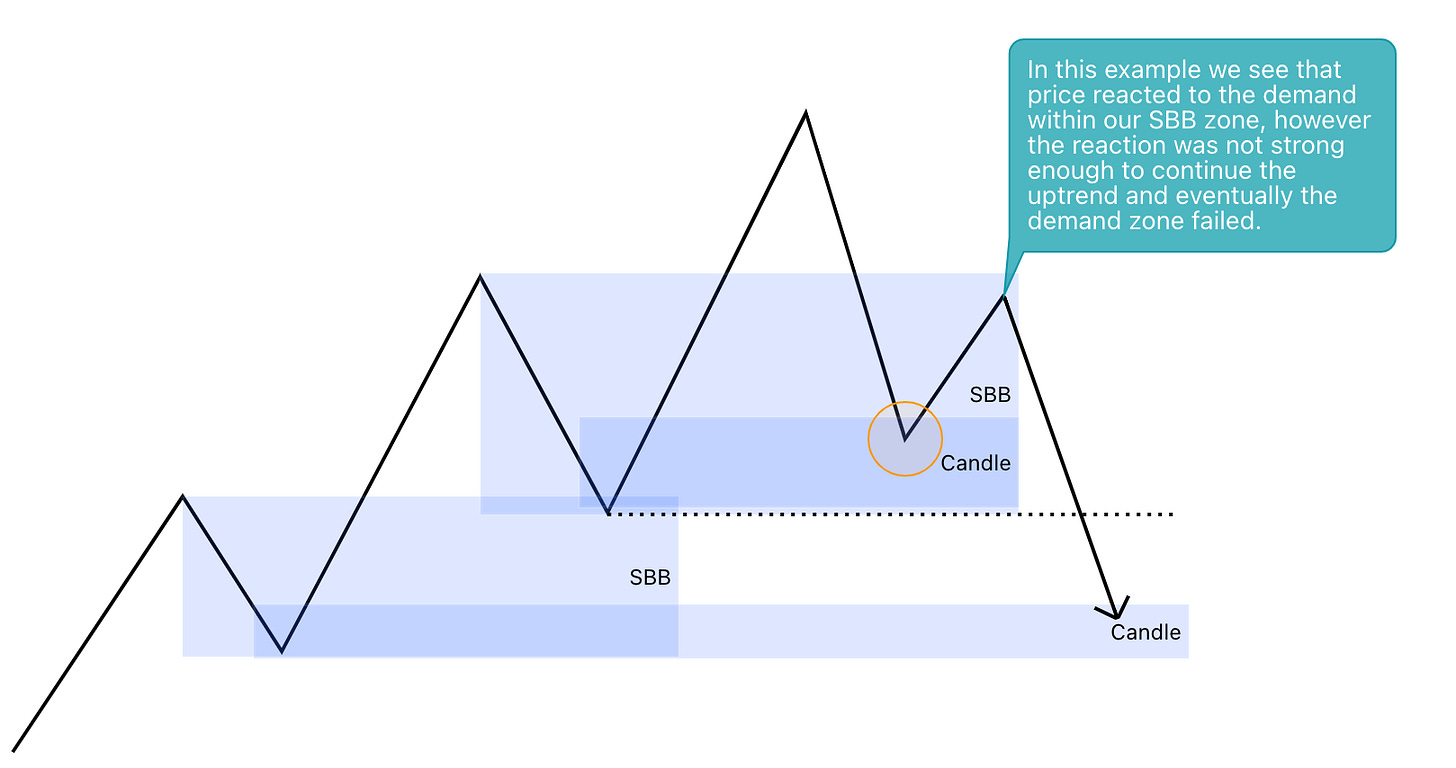
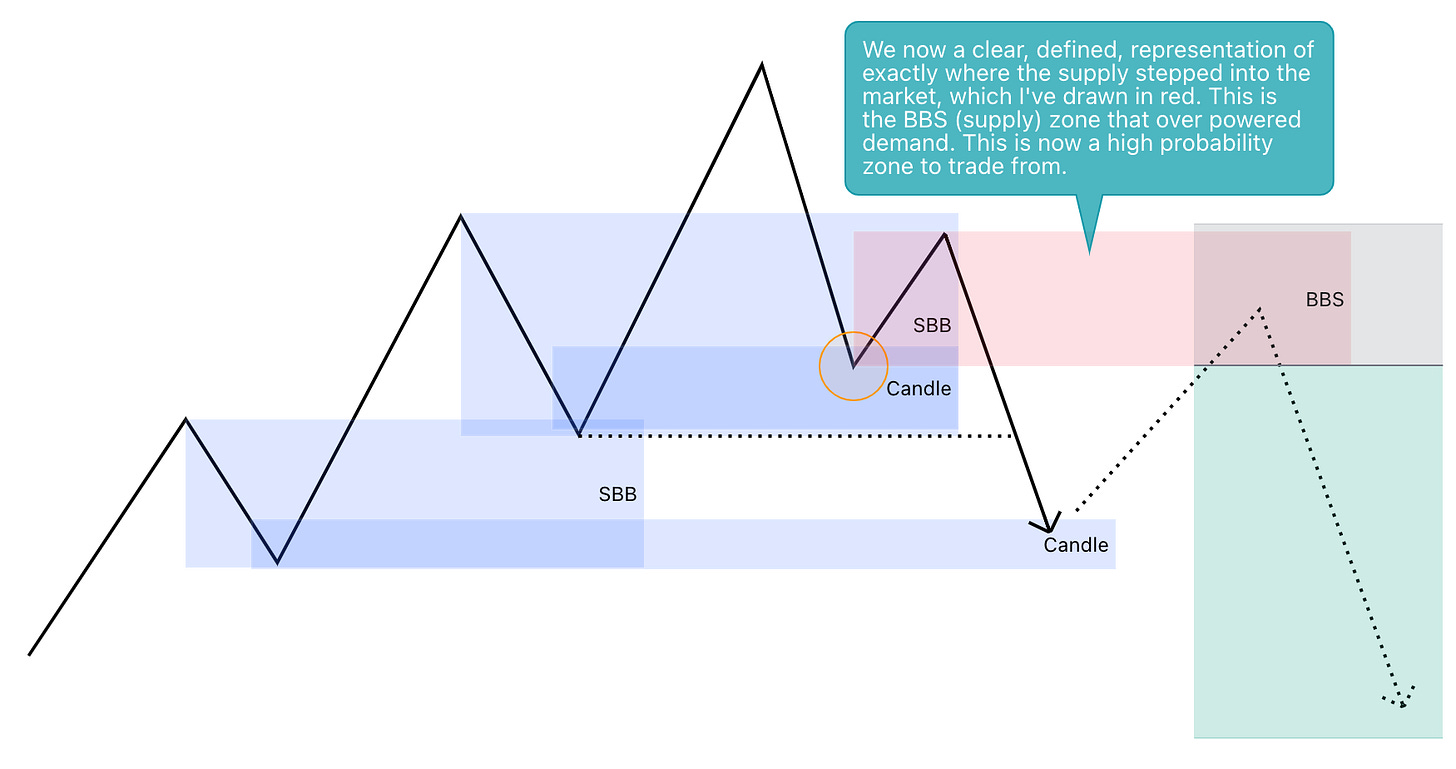
Let’s have a look at the second type of flip zone; one that creates a reaction.
Next I will continue this lesson in the video tutorial above where I will go over live chart examples of how I find, draw, and trade from flip zones, as well as some things to be aware of.
Flip zones are one my favorite zones to trade from and the best part is you can find flip zones across all timeframes.
Test these out for yourself and let me know what you think below in the comments.
If you found this article helpful, please consider sharing this on social media for others to find as well.
Next week I will continue with part three of my supply and demand series where I will go over inside bars!
Until next time — Happy trading!
Mr. E


